Thanks for stopping by! We're two cousins who love to craft on the cheap and share our ideas. We'd love for you to stay awhile, pull up your Pin it! button, sewing machine, and let us know what you think!
Showing posts with label Rent-friendly. Show all posts

Tuesday, March 19, 2013

Chore Charts

They’re a necessary evil.  But, in my house, they make our days go a bit smoother.  Everyone knows what they need do before bedtime.

When my kids complain about their chores and call me mean, I just tell them, “I’m not mean!  I am teaching you life skills!  When you grow up and leave home you’ll thank me, because you will have had lots of practice doing {insert whatever they’re complaining about here}!”

For a long time, I used a chore chart like this:

Chore Charts from The Crafty Cousins (3)

When my boys finished their chores, they’d just wipe them off.  It works great!

Only….sometimes I forget to write their jobs down.  We also started an allowance system, where they get a nickel for every job they do without being asked.  That was getting hard to keep track of, especially since we were ERASING the chores as they were completed.

What to do?

Thanks to KidPointz I’ve got that one all figured out!  They have about a million different behavior/chore/exercise/homework/etc… charts to choose from. 

behavior-chart-pirates-003-400

I chose four different designs from their behavior charts and filled them in with our chores.  (I only made four since Monkey is only two and doesn’t have chores.  Yet…) 

Chore Charts from The Crafty Cousins (2)

I laminated them so that they can mark their chores off with a dry erase marker.  Each chore is worth 5 points.  Five points=one nickel.  At the end of the week, they get the money they earned throughout the week.

You’ll also notice that these chore charts don’t have names on them.  I’ve numbered them 1-4, and each week we rotate charts.  This way, my kids get a variety of household chores!  Score!

This system has been working out really well for us.  My boys are loving the allowance.  I am loving the motivation they have to do their chores.  There’s also less fighting, because they know what they’re supposed to be doing.

You may be thinking “A nickel per job?  That’s it?!”  Don’t worry, it adds up, and their chores aren’t the only way they earn nickels.  They also earn them when I catch them doing good.  They can also lose them…

Whenever they want to cash in their nickels, I trade them for cash.  That way I’m not always running to the bank for nickels, and my boys aren’t carrying around 50 lbs. of change. 

If these chore charts don’t suit you, check these out:

Chore Charts from The Crafty Cousins (1)

Here’s a fun one Ash made a few months ago.

This Family Home Evening chart could easily be converted into a chore chart:

Chore Charts from The Crafty Cousins (4)

Anyway, there’s a few ideas.  What works for you and your family?

signature nat

P.S.  KidPointz didn’t sponsor this post.  I’m just sharing the info and their site because it works for us.  Their charts are free, too!  Bonus!!

Pin It!

Monday, February 18, 2013

Girls’ Room Reveal!

Okay you know those AWESOME room reveals all over the internet that have amazing before & afters, and pretty much blow your mind? This isn’t one. For several reasons. We rent. We can’t  paint walls, and most of the furniture isn’t even ours. It’s our landlords. We don’t know how long we’re going to be here, but we know it’ll be awhile, so we don’t do a ton of nail holes (because I’ll just have to patch them all), and our girls have very strong opinions, so they get input on their room. In parts. Okay, so with all that said, here’s their room. Some stuff you’ll recognize, but some stuff will be new, and this will just show it all working together, mkay?

First off, do you remember (if you’ve been here awhile) how Thing 1 told me she wanted a Fancy Nancy room? Like so:

So little by little the past month, I’ve been doing things for their room to make it “fancier”. (she reminds me of the checklist all the time!)

Girls Room (2)

Remember the bedspread I showed you here?  Yeah, I sewed that bedspread. It took forever. But not as long as Thing 2’s bedspread, since I hand-dyed everything for that.

Girls Room (26)Girls Room (27)Girls Room (28)Girls Room (25)

Do you remember the sparkly pillow from a shirt? I made that cute ombre heart pillow from using 2 tutorials from V and Co. This one for the heart and this one for the ombre pleats. Then I made the turquoise shag one using this tutorial from V and Co. Pretty pillow? Check!

Girls Room (9)

Yeah, that bedspread and pillows. Okay, back to Thing 1’s bedspread.

Girls Room (2)

Feather boas strewn across the headboards, set in place with thumb tacks. Feather Boas? Check!

Girls Room (24)Girls Room (20)

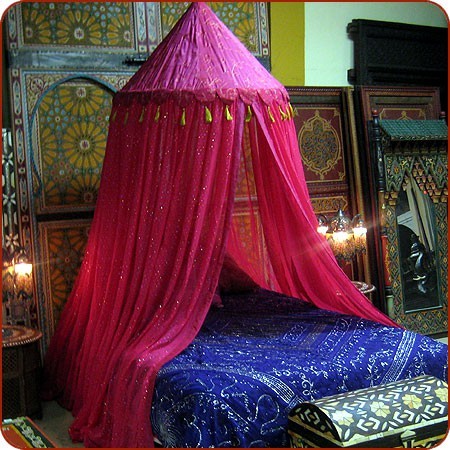
Then you can see the Flower Canopies I made on each bed with my Command hook rent friendly tip. Canopy? Check!

Let’s see, above the bed is some of my rent-friendly polka dot décor. It used to be spread all around the room (but the room is GINORMOUS), so I took them all off, and put them on one wall, and layered some of them.

Girls Room (16)

I kinda love them, so do the girls. You can also see the Christmas Ornament lamp (about halfway down the post) my hubby helped me make.

Girls Room (23)

Girls Room (14)

You can also see the mini gallery wall that they helped me paint all the frames, and the blessing dresses I made for each them when they were born.

Girls Room (15)

The little banner is sweet. Thing 1 wanted to try sewing, so we used hole punches to cut out bunches of shapes, then she sat on my lap and helped me sew them together.

Girls Room (3)

Right by the bed is the microwave cart bookshelf I revamped from my Grandpa. Plus a diffuser to prove that they’ve been sick for the last 2 weeks….Ugh.

Girls Room (17)

Right by that is my first upholstery project. Still love the chair, still going strong! Can you see the woven rug I made on the floor? Fancy Rug? Check!

Girls Room (18)

Right next to the chair is all their bows I’ve made them on the bow holder. I showed you a few bows here, and Nat showed you some here.

Girls Room (19)

Then the mirror I “fixed” with washi tape. Love that stuff! Hanging on the back of their door is this:

Girls Room (5)

They have so much crap. Little rings, necklaces, etc. I get so tired of stepping on things, so we hung up this and put on labels.

Girls Room (7)

With pictures on them so they know what goes where. They helped decide so they keep it a lot cleaner now!

Girls Room (4)

I forgot to show their mismatched curtains. I made the yellow one for our previous rental, but it didn’t work by itself on a this larger window, so they picked out the other curtain from the DI (a thrift store), and they think it’s fancy to have colorful curtains. There’s also a strand of Christmas lights strewn over the top and side that they love. (Lights? Check!)

Girls Room (1)

Hung over the top of the closet doors is a strand of turquoise (a fancy word for blue) beads I got on clearance at Target after Christmas.

Girls Room (8)

Then there’s the kitchen I made for them last summer, and the growth chart a few months ago.

Girls Room (11)

My hubby painted this dresser we got from my parents way back in our first house when we were expecting Thing 1. It was already blue, so he painted the minty-turquoise color with a crackle paint.

Girls Room (12)

I still have a project I’m working on for above the dresser here. It’s pretty fantastic in my head!

Girls Room (10)

Hanging on the wall is my thrifted painted owls, and more of my free cornstarch art. Then, there’s the stuffed animal storage I made, and an old bookshelf that was painted the same time as the dresser.

Girls Room (13)

This other dresser I got from my grandparents, and painted a few summers ago, but I really would love to strip it down and refinish it. Maybe something like this?

(source)

Girls Room (21)

Finally, right by Thing 2’s bed is the dollhouse I made 2 Christmases ago for the princesses.

Girls Room (22)

Speaking of princesses, all of their dress up clothes currently reside in their closet where they can reach them, and mostly stay put away…

So, there is the reveal. Eventually when we do move into our own house (whenever that is) the girls will probably not have a HUGE cavernous room. Plus, we’ll have to get a bit of new furniture. So, I just did touches of fancy to make them happy, and they love their room. It’s fun to look back and see all of the projects that have come together to make their room theirs. If I can finish the awesome art I’m working on (think pallet art) then it will be that much cuter.

I’m trying to decide if I should enter the contest Creating with the Stars. It’d be awesome to try, but I just don’t know if I can do awesome things when I’m in a (basement) rental and on a very tight budget. Are you going to enter?

Pin It!

Monday, January 28, 2013

DIY Flower Canopy

Okay, here’s yet another post about my daughter’s fancy room. It’s been an involved process! But I am working on about 4 other projects simultaneously, so I will have some other non-fancy stuff soon.

She wanted a canopy, if you’ll recall.

So, that was actually a really fast thing to do. I had everything already. I just glammed it up a bit more than just regular tulle. I’m sure you’ve seen these floating around, specifically like this:

(source)

(source)

(source)

So, I got about 20 yards of white tulle, between my 2 princesses, 2 embroidery hoops, pompom trim, and some silk flowers. I put the tulle inside of the embroidery hoop when it was folded in half, and put a rubber band around the halfway part. I hot glued pompom trim onto the embroidery hoops. Then, a couple of hours of movie watching with the husband, I pulled silk flowers off their stems and sewed them onto some fishing line, tying knots around each one, until I had 4 really long (read: about 12 feet each) flower strings. I put those into the embroidery hoops too.

Canopy (2)

Canopy (4)

Now, the real trick was figuring out how to hang it from the ceiling in our rental…. So, I got a large command hook and drilled a hole through it.

Canopy (6)

It was about 1/8” or 3/16” drill bit. Just whatever fits between the ridges behind the hook. Look at one, you’ll see what I mean.

Canopy (1)

Nice clean hole in the Command hook. I emailed them, they don’t have any products yet for hanging things from the ceiling. They did tell me not to hang anything over a bed, so don’t hold them or me responsible if you choose to do so. That’s why I used a large hook because the weight limit was a lot more, even though these don’t weigh much at all.

Canopy (3)

Then I put it on the canopy using fishing line again. Just looped it through the hole and through my rubber band loop and tied some knots.

Canopy (5)

Voila! That’s French, and so very fancy. They love their fancier beds, and since nothing is near them laying on the bed, I’m not worried about strangulation or any such nastiness.

Pin It!

Wednesday, September 19, 2012

It’s all a Sham

Just to refresh your memory, we are renting somebody’s basement. They have a very large house, and decided to do a completely self-contained basement so when they’re old and gray, they can have a family member move in and still live on their own. Pretty much the entire thing was furnished too. Meaning the couches, rugs, kitchen table, chairs, our dresser, and even our kid’s beds were already here, and are not ours. The carpet and walls are a nice neutral, but I’m not much of a neutral person. (my hubby is, so it’s called compromise….)

Pillow Shams (7)

This is a picture of the couch we have, after my kids have been jumping on it and squishing the pillows down.

Pillow Shams (8)

See the pillows? All different shades of gray. I mean tan. The couch is made of down, and it is SO comfortable. But I felt like I wanted some more color. I don’t want to buy anything, cuz it is a rental and therefore not permanent, nor ours. Enter Miya Designs. I’ve talked about them many times, and will continue to talk about them. They not only sell amazing stuff in their boutique type store (in Syracuse, UT), they also have very talented designers that completely design houses, rooms, whatever. No, they aren’t sponsors, they’re just awesome. I got 4 quotes on carpet to replace the ugly green carpet in our house that we’ve been trying to sell for 2 years (*sigh* don’t even get me started)samoa railing

See the forest green carpet? Anyway, out of 4 companies, theirs was the best quote, lowest price, fastest service, and nicest looking carpet. This is how my house looks now. (note I paid for this. I’m not getting anything from Miya Designs, seriously. Just love them)

Tremonton with new carpet

Oh, man it lightens things up so much! So, I love Miya Designs. Back to my house project. I went by Miya’s and they were having a HUGE sidewalk sale. It was insane. Like, I’m glad I came for one thing and actually stuck to my budget type sale. They had all sorts of remnants that they couldn’t use after their design projects, so really nice fabric was CHEAP. I got some sheer fabric that I was buying, and it was originally $100 a yard. What the?!? I got it for a few cents. Seriously. Crazy talk. So I used this upholstery fabric from Miya’s to make some new pillow shams. I just put it right over the current pillows, so less feathers poked out and jabbed my arms. (anyone else get that with down?)Pillow Shams (2)

Isn’t it pretty? I’m not a HUGE blue person, but I think this is really nice and works with our rental. Have you ever made a simple envelope case for a pillow form? Super easy. First measure your pillow. Add 1” to the measurements, and that’s how big you cut your front. I added 1 1/2” since I didn’t want them to be super snug, and not go over the other cases easily. So, if you’re doing a 15” pillow, cut a 16”square. Clear? For the back, you want an overlap and 2 pieces, I go with a 3” overlap, generally. So you divide your number in 1/2, and add on your 1” (for seam allowance), and then another 3”. So with a 15” pillow, you divide in 1/2 for 7 1/2”, then add on 4 to get 11 1/2”. You can go with a nice even 12” just to make it easy, if you so desire. So you’d cut 2 pieces of fabric 11 1/2” (or 12”) by 16” and you’ve got your front and back. Next, if you want, you finish the edges. At least finish the edges of the 2 edges were the overlap is. Unless you happen to cut that on a selvage, which one of mine was.

Pillow Shams (4)

Notice how I zig zagged along the edge? Now, press those 2 back pieces over 1/2” on the long side. So you’d press over the 16” long side.

Pillow Shams (3)

This was a selvage cut piece, so I didn’t have to finish it. After you’ve pressed them over 1/2”, sew along as close to the raw edge as you can, so about a 3/8” seam.

Pillow Shams (6)

Do you see that? Now, before I confuse any of you, I decided to do 2 pillows with the blue outside, and then 1 with the brown, just because I liked the contrast. The brown is really scratchy, but it looks pretty. Next step is to sew your pillow together. Line up the corners, Pin everything down, and make sure you overlap the back pieces. I like to back stitch over the overlapped part a few times just to make it nice and secure.

Pillow Shams (9)

Once you’ve stitched all the way around your pillow, you’ll want to cut the corners. Yep, you are cutting corners peeps.

Pillow Shams (10)

This helps your corner be nice and poky. Turn it inside out and iron everything nice and flat (poke your corners out with a pencil or something somewhat sharp)

Pillow Shams (5)

And then put in your pillow form and you’re done!

Pillow Shams (11)

I only recovered 3 of the pillows, because they were the exact same fabric as the couch, so it helped break things up. Plus, 2 of the pillows are suede, so nice and soft Smile It was a subtle, not huge difference, but it’s made me feel more at home in my rental.

Pillow Shams (1)

I also made a fun circle pillow to go on my rocking chair that actually is ours. Little touches make a home, right?

Pin It!
Related Posts Plugin for WordPress, Blogger...