
Next time don’t sing with me again. I can do it by myselfYep, that’s my daughter’s ending to the song. She doesn’t want help she told me. She can do it by herself. Makes me laugh when she sings it though. So, you know how moving you tend to find a butt load of crap you had forgotten about? Yeah, that has happened to me a ton this most recent move. I found this quiet book I had made for my daughter YEARS ago, and it’s still good, so I thought I’d share it with you. This isn’t so much a tutorial as a “here’s an idea, mkay?”
")
K, first thing, pretend that the “C” is complete and not falling apart. This is the cover. The “A” is hot glue with Sharpie marker colored on top. The “B” is acrylic paint put on with the back of the paintbrush to make it more bumpy. The “C” was seed beads, but I’ll most likely be changing that. Now, here’s all the pages. Keep in mind this is all made with scrap fabric and supplies, so I used what I had. You can use whatever you have.
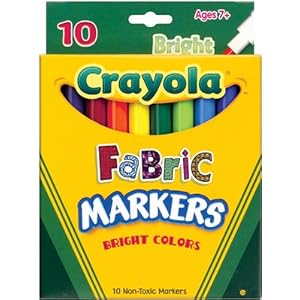
All of the words were written with Fabric markers. Like these from Amazon. Love them!
")
A is for apple. The apple is this shiny, sparkly fabric I had. The leaf is some smooth, nylon-type fabric I had. The stem is drawn on.
B is for bee. The body of the bee is felt in black and yellow. The wings were tulle.
")
C is for chest of treasure, with the chest being brown fabric, and the beads and buttons sewn on with yarn. As super secure as I could make it.
D is for desert. The cacti are drawn on, and the sand is sandpaper sewn on.
E is for eye. The blue part is this reflector fabric I had leftover from making my hubby running bands. The rest is just plain fabric.
F is for fish. This sparkly gold fabric was all I used
G is for garden. I sewed/hot glued leaves and flowers on as secure as I could.
")
H is for haystack. I used leather fringe stuff, just sewn on in layers.
I is for ice cream cone. Regular ol’ fabric for the cone, and batting for the ice cream.
J is for jean jacket. I cut out the pants/jacket from some denim, and drew on the stripes.
K is for keys. I cut some keys out of leather, and put them on a cord and sewed the cord to the page.
L is for ladybug. I drew the spots on first, then sewed some red lace over that and drew the head.
")
M is for moon. It’s some satin I had around.
N is for Net. I drew some fishes, and sewed on some netting I had (I actually used a piece of a loofah.)
O is for octopus. I sewed down his body, and put elastic on the legs so they were kind of bunchy.
P is for peacock. I used fabric for the body, and drew on the face. I sewed feathers and ric-rac down for the feathers, and pipe cleaners for the legs.
Q is for quilt. I made a little rag quilt and sewed it on the page.
")
R is for robot. I sewed pop can lid things on, and I also sewed on tin foil for the shininess, but the body came off. You can still see the head.
S is for sun. I used the satin again, and sewed on ric rac and pipe cleaners for the beams.
T is for turtle. I used some soft, green fleece I had.
U is for umbrella. I used corduroy and a toothpick.
V is for violin. I drew on the violin, and then sewed some kite string on for the strings.
")
W is for waterfall. I sewed on some sparkly blue fabric, and then added some blue trim on that. I drew on little details on the water too.
X is for xylophone. I drew the box, and added trim for the gold parts.
Y is for yarn. I sewed some yarn through the page, making it look like a yarn ball, and left a little coming out.
Z is for zipper. I just sewed a short zipper on the page.
K, so the main idea is just cut out your fabric the size you want (add a 1/2” to all sides for seam allowance, and 1” to the inside seam to make them all come together. Make each page how you want, and then sew it to the other side it will be with (leave the part that will go in the binding open so you can turn it inside out and put in the cardboard). I used this tip I shared here (another quiet book style I’ve made):

and put cardboard in between the pages to give it more substance. I just use cereal boxes, but make sure the design doesn’t show through your fabric page. If it does, just put a plain piece of white paper in there too. Make sure to press the pages really well so they look even more nice and crisp. After you’ve put in your cardboard, sew just along your cardboard line to make sure it doesn’t move around and stays nice.
")
Because I was using a striped fabric for my cover, I thought it’d be fun to do my pages striped too. So it goes blue white, blue white, just for fun.
Finally, after I made the cover, I left about 3/4” open between the very back with no cardboard. Let me draw something really quick…

K, so if the red is your fabric, then you sew along the white lines, and stuff cardboard in the places it says to. So the part that says nothing is about 3/4” wide, and the cardboard spine is as thick as all you pages stacked on top of each other. The cover cardboard pages are about 1/2” bigger than your pages all around. You can look at the other pages to see the overhang of the cover. Make sense?
")
Then, you take you pages and put them in your cover which is already to go (meaning stuffed with cardboard, and whichever side you left open to stuff everything and turn it inside out is hand sewn shut…) and you hand sew with some bigger thread (I used some embroidery floss) and sew the spine of your pages. You can see my stitches in the picture above. I sewed right over my stitching on the cover, and right below the stitching holding my cardboard in on my pages.
 copy")
Voila! You’re finished! This was a little bit of a labor of love, but it turned out so fun, and she still likes it! Success!
As I said before, use whatever scraps or fabric you have around, and just think outside the box. Maybe do a turkey instead of a peacock. If you have a frog button use that for F, or turn the garden with silk flowers in flower for f. It's your book! Use whatever you have! And have fun. This is easily something you can pin, design and doodle while watching your period chick flicks. What, just me? Okay, well, whatever. Happy Crafting!


No comments:
Post a Comment
Thanks so much for taking a minute to let us know what you think! We read and appreciate all of your comments!